No doubt, going through old photos brings back happy memories you will want to unpack and display for family and friends. Every time I take out my photo boxes, I wonder how I can display my prints without spending a fortune on frames! Transferring old photos to wood is a super creative and cost effective way to display your favorite photo prints!
What You’ll Need
All of the items you’ll need for this exciting project can easily be found at your local craft store!
- Unfinished wooden painting panels
- Craft Paint in the color of your choice
- Sponge paint brushes x2
- Mod Podge
- Photocopies of your pictures on regular printer paper
- Clear glaze spray
- Light sandpaper
Paint and Party
The first step to transferring your photo to wood is to paint the edges of your wood with the colored craft paint you chose. It’s okay if the paint goes a bit over the top of the wood piece! This gives your project an adorable rustic and handmade charm! The sponge paint brush is an easy way to make clean lines! If you’re feeling a little daring, you can add other designs to jazz up your edges, like polka dots, a chevron pattern, or even some glitter! While the paint dries, go ahead and make copies of your photos on regular printer paper. Once the paint is dry, you’re ready for step two!
Transferring is the Solution!
Next, take your photocopy and apply a generous layer of transfer solution (Mod Podge) to the front. If you want the wood grain to show through a bit, use Mod Podge Matte. If you’d prefer a more crisp background, choose the Mod Podge Transfer Medium. Whatever your preference, this is where the process gets interesting! Once the transfer solution has been applied to the front of the photo in a nice, thick and even layer, turn the photo over and press it against the wood piece. The photo should be smoothed down firmly and evenly across the entire wood piece to ensure the entirety of the photo is captured on the wood. Now, it’s time to wait! Have a cup of coffee or hot coco. Kick back and and chat, or if you’re working on multiple transfers at once, start another transfer while this one dries!
The Big Reveal
Once the transfer solution has completely dried, take a wet sponge or paper towel and begin gently rubbing away the paper to pull back the curtain from your photo! You’ll start seeing the faces of your loved ones peeking through the paper! One strategy that worked really well for my transfers is to rub away the paper in layers. Sometimes it can be hard to tell what is paper pulp and what is just moisture. If you gently remove a thin layer of paper from one section and then move on to another, the paper’s pulp will dry out as you move along, and you can go back for another round. This process really helps you see what has been removed and what remains! This part takes a bit of TLC, but is ultimately my favorite part of the process, as I see the photo slowly come through on the wood.
Signed, Sealed, Delivered!
Allow the newly revealed portrait to dry completely, and you’re almost there! The final step in the transfer is to coat the photo with clear glaze! Before you do this, lightly sand the edges to ensure a perfectly smooth surface. Then, spray the transfer with the glaze and allow it to dry. Be sure to allow adequate drying time, or you may end up with finger prints in your glaze! Now, where to put your transfer?! On the mantelpiece, on the side table for friends and family to admire? If you made multiple transfers, you might consider setting them out, collage style on a table or credenza!
Fantastic, Not Faded
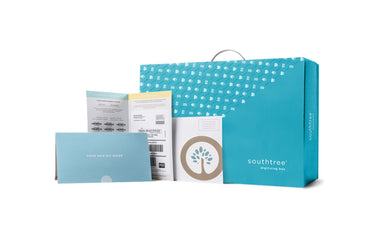
You can feel confident that your transfers will brighten up your family room! Unfortunately, our real photos aren’t covered in a trusted glaze for protection, but you can preserve them! Southtree’s goal is to digitize your photos with our top quality digitization process! When you digitize your photos, you can count on a transfer as clear and crisp as your original and a digital file that can stand the test of time!